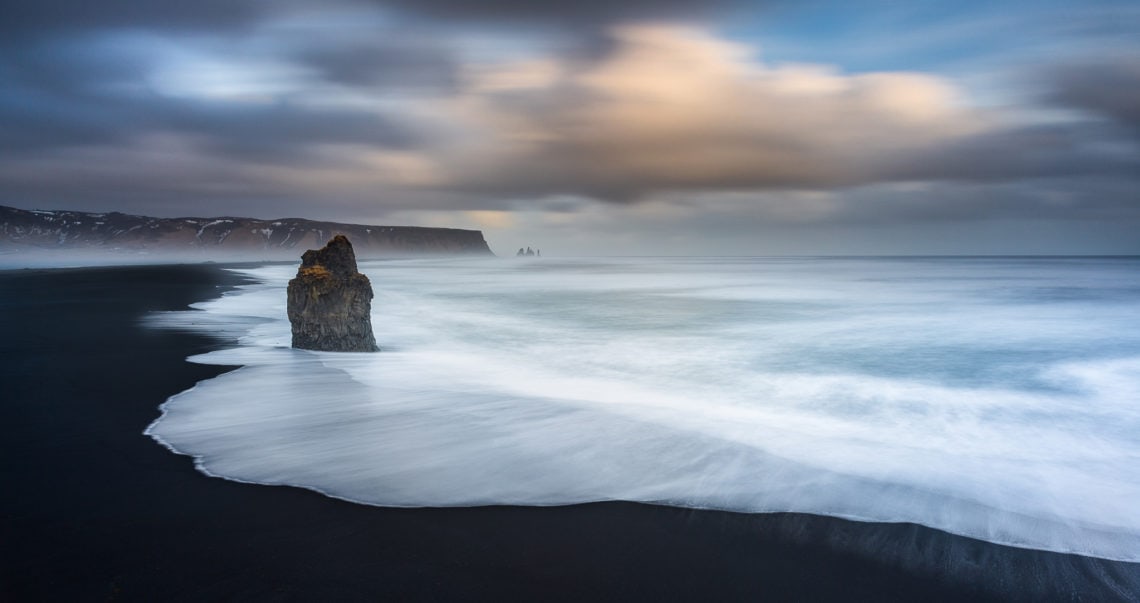
Long Exposure is really popular among photographers all over the world, also thanks to the availability on the market of high-quality photographic filters such as those offered by NiSi.
Although this technique can be used both in studio and outdoor, it has found its most popular expression in landscape photography.
To beginners, it often happens that the result is quite far from our expectations and out of frustration we set aside our hope thinking it is something out of reach.
Follow this step by step guide to long exposures and you will find out how simple it is to obtain a Long Exposure on the first attempt (or almost!)

Our guide will follow a practical approach to long exposure, we’ll start from the very beginning when you’re still at home because Landscape Photography is much about planning.
Long Exposure Guide – Step 1
Check the weather. A cloudless day is a good day to have a beer with friends, not the ideal to attempt long exposures.
Be aware of the weather through the use of satellite images and radar that can show you the most likely evolution in the short term to understand if a storm is approaching or if the downpour is about to end. Use apps like Windy and check if the best condition is likely (a patchy sky is what you’re looking for).
Long Exposure Guide – Step 2
Visit the location in advance. You will need time to find a composition that will suit a long exposure shot. When shooting with long shutter speed the camera sees differently to what you see with your eyes.
You have to force yourself to visualise the long exposure composition, looking for harmonious compositions that include moving elements.
Try to check the direction of the clouds and the movement of the sea. Try not to get the sun into the composition as its movement will most probably ruin the shot, creating a heavily overexposed area impossible to recover in post-production. If you can’t avoid it, wait for it to hide behind a cloud or a hill.
Long Exposure Guide – Step 3
Put your camera on the tripod and install all the accessories such as the remote shutter release and the NiSi V7 or V6 filter holder (if you intend to use square filters). For the moment, however, install just the polariser and GND filters (if any), don’t install any ND filter (very important!).

Long Exposure Guide – Step 4
Refine the composition, focus and lock the focus (i.e put the manual focus setting on your camera). If you are using manual focus, problem solved. If you are using autofocus, press the shutter-release button halfway to focus and immediately move the selector from Auto Focus to Manual. This way your camera will maintain the selected focus and will not attempt to change it once the ND filter is installed. Read here a detailed guide about focus in landscape photography.
Long Exposure Guide – Step 5
Now set your camera in Manual (M) or Aperture Priority (A/Av) mode, set the aperture to a value appropriate for the scene and take a “test shot”. The test will be successful when you get the correct exposure. To determine if the exposure is correct, check the histogram (don’t trust the display, it’s too bright!). It is true that there is no “correct” histogram, but there are certainly incorrect ones. That is, shifted too far to the left (underexposed) or to the right (overexposed). Once you are happy with your test shot, take note of the exposure time with which it was taken.
Long Exposure Guide – Step 6
Install your NiSi ND filter now. If the filter has a very high density such as 10 stops or if the ambient light conditions are very low, you will not be able to see anything either through the viewfinder or through the LiveView of your camera. Don’t worry, because if you’ve followed this guide, you’ve already done both composition and focus.
You are now “blind” but your camera sees fine because you will set a shutter speed long enough to capture all the necessary light.

Long Exposure Guide – Step 7
Now set the Bulb mode on your camera to exceed the thirty-second exposure limit. If your camera allows you to shoot for more than 30″, great, but remember not to touch the body as you can incur in blurring. You can use a remote shutter release, perhaps programmable, or the delayed shutter (timer). Do not change any other setting (ISO and Aperture), leave them the same as those used in the test shot.
Long Exposure Guide – Step 8
Finally the time has come to take our long exposure! But how many seconds should the shutter be left open? It really is simpler than you think!
First of all, take the exposure time of the test shot taken previously. At this point compensate this time with the density of the installed filter. For example, if the exposure time was 1/15 of a second, adding a 10 stop ND filter will result in a new shutter speed of 60 seconds!
Don’t worry, you don’t need to be a mathematician to immediately find the correct shutter speed: you can use a conversion table like the one you find in this article as well as several dedicated applications for your smartphone.
Long Exposure Guide – Step 9
Once your shot is complete, check the histogram. If the new histogram is roughly the same as that obtained in the test shot, mission accomplished!
If, on the other hand, it is too far left or right, repeat the shot with the ND filter, correcting the selected time appropriately. If it is shifted to the left, underexposed, the shutter speed increases. If it is too far to the right, overexposed, decrease it.

NiSi Neutral Density Filters
NiSi makes neutral density filters (ND) available to all photographers with which you can extend the shutter speed giving freedom to your creativity
NiSi ND filters are all made of high-quality lens grade optical glass as not to miss even the smallest detail in your images.
The special Nano Coating on both sides minimises unwanted reflections and waterproofs the filters.
It does not matter if you use a square system or screw-in neutral density filters, NiSi has the ND filter for you.
NiSi produces ND filters from 2 to 20 stops to meet each specific requirement. The density of the filters is shown in both the number of stop reduction and in the traditional density scale.
For square systems, NiSi supplies ND filters for many filter holder systems produced: 75mm, 100mm, 150mm and 180mm.

