


Choosing which ND filter to buy is not easy, because there are several things to consider. The density — the strength of the filter — is the choice that seems hardest when you decide to buy your first one. In this article we will look at how different Neutral Density filters create different effects on the photograph, and why getting started is simpler than you think.
Shooting video, or would you rather use circular magnetic filters than a square holder? Have a look at the JetMag Pro magnetic system — the advice on densities below applies either way.
Updated September 2026.
In this guide
- The short version: which density for which situation
- What is an ND filter?
- Why buy an ND filter?
- Which density should you buy?
- Examples of different ND filter strengths
- What ND filter to choose for landscape photography?
- Save up to over 30% with ND filter kits
- Prefer magnetic filters to a square holder?
- Common questions about ND filters
The short version: which density for which situation
If you want the reasoning, it is all below. If you want the answer now, this is it.
| Filter | Light reduction | Where it fits |
|---|---|---|
| 3 Stop (ND8, 0.9) | 8× | Late afternoon to after sunset. Woodland streams and waterfalls. Slight movement in the waves. |
| 4 Stop (ND16, 1.2) | 16× | Just before blue hour at sunset, and shortly before sunrise. 30 seconds to 2 minutes, when 3 stops is not enough. |
| 6 Stop (ND64, 1.8) | 64× | The usual first filter. Long exposures from the afternoon; beyond 2 minutes around sunset. |
| 8 Stop (ND256, 2.4) | 256× | Seascapes with the sun low on the horizon. 1.5 to 3 minutes: smooth water, stretched clouds. |
| 10 Stop (ND1000, 3.0) | 1000× | Very long exposures from the early afternoon; beyond 5 minutes around sunset. |
What is an ND filter?
ND stands for Neutral Density. It is a piece of dark glass that sits in front of the lens and cuts the amount of light reaching the sensor. Nothing else about the picture changes: the framing, the focus and the depth of field stay exactly where you put them. Only the quantity of light is reduced.
The word that matters is neutral. A neutral density filter is meant to absorb every wavelength of visible light by the same amount, so the photograph gets darker without getting warmer, cooler or greener. That is the whole difference between an ND and a coloured filter — and it is also where cheap ND filters fail, leaving a blue or magenta cast that has to be corrected afterwards. Good glass and the right coatings are what keep the neutrality: there is more on that in our article on ND filters without colour cast.
The strength of an ND filter is expressed in stops. One stop halves the light, so the shutter has to stay open twice as long to reach the same exposure. Two stops means four times as long, three stops eight times, and so on. The same filter is usually labelled three different ways — as stops, as an ND number (ND8, ND64, ND1000) and as an optical density (0.9, 1.8, 3.0) — which is why the numbers on the box look confusing at first. We explain what the ND filter names and numbers mean separately, and there is a conversion table and exposure calculator if you want to work out shutter speeds.
What is an ND filter used for?
Two things, mainly. In photography it buys you a long shutter speed in light that would not normally allow one: moving water turns smooth, cloud stretches into trails, people walking through a scene disappear altogether. In video it does close to the opposite job — it lets you hold the shutter at 1/50 and the aperture wide open in daylight, instead of stopping down and losing the shallow depth of field you chose the lens for. If you shoot video the question is not really which density, but how much range you need: we work that through in how many stops of ND you need for video.
Circular or square?
Circular filters screw or clip straight onto the front of the lens. They cost less, fit faster and take up less room in the bag, and with a magnetic system they come on and off in a second. Square filters slide into a holder mounted in front of the lens: more expensive, but they let you stack several filters at once and, more importantly, use graduated filters that you slide up and down to line up with the horizon.
For a first ND filter, circular is usually the sensible answer. Square earns its place when you start using GNDs, or when the lens is too wide for a screw-in filter to sit in front of it without vignetting. Either way, everything below about density applies unchanged: a 6 stop is a 6 stop whichever way it is mounted.
Why buy an ND filter?
In the simplest terms, an ND (Neutral Density) filter is the fourth way to manage light in your photography. The first three are ISO, shutter speed and aperture. In landscape photography those three are effectively fixed, so a fourth way is needed to manage the exposure. Here is briefly why ISO, aperture and shutter speed are considered “fixed”:
ISO
We want to keep the base value, because the sensor performs best there: greater dynamic range, less noise, and therefore more detail and a cleaner image. At most we move 1-2 stops from the base value, and the lower the better.
Aperture
Here we want to define the depth of field and the sharpness of the image. There is a fairly narrow range where a lens performs at its sharpest, usually between f/8 and f/11. The aperture also sets the depth of field, so we want to be sure the whole field of view is in focus in most situations. Again we can move by about 1-2 stops, usually between f/7.1 and f/14.
Shutter speed
Once the first two values are set, only shutter speed remains. If we want the photograph correctly exposed, we have to accept the one value that satisfies the other two, with some tolerance given the margins above. That leaves only a few shutter speeds that produce a correct exposure, which limits our creativity. Because photography is creativity and not mere execution, we need another tool to manage the light and let us choose the shutter speed we actually want.
That tool is the ND filter
We also recommend our article showing some examples of shutter speed and ND filters in landscape photography.
Which density should you buy?
This question has crossed the mind of everyone approaching ND filters for the first time, and of anyone looking to expand their kit. The density is simply the absorption factor of the filter: the higher it is, the more light is blocked, and the longer the shutter speed has to be to compensate. For the detail, there is a full explanation of ND filter names and numbers here, and an article on calculating exposure times with ND filters, including a conversion table.
3 Stop ND filter (ND8, 0.9)
Reduces light 8 times, so the shutter speed has to be multiplied by 8 once the filter is on. It is not suited to bright midday sun, but works from late afternoon through to after sunset. In the late afternoon it lengthens the exposure just enough to put a little movement in the waves without turning the whole sea silky. After sunset, or in very low light, it can allow exposures of 1 to 2 minutes or more. It is also used for streams, rivers and waterfalls, especially in woodland where the light is already scarce.
4 Stop ND filter (ND16, 1.2)
Reduces light 16 times. This is the sweet spot in the window just before blue hour at sunset, and in the one shortly before sunrise: the moment when you want to work with genuinely long shutter speeds — roughly 30 seconds to 2 minutes — and a 3 stop simply is not enough to get you there.
It is worth considering as an alternative to the 3 stop rather than an addition to it. If you like your exposures on the longer side, the 4 stop can replace the 3 stop in your kit entirely and cover the same moments with more room to breathe.
6 Stop ND filter (ND64, 1.8)
With this filter the light is reduced 64 times: if you were shooting at 1 second without a filter, you go to 1 minute and 4 seconds with it on. With a 6 stop it is genuinely useful to have a remote shutter release, so you can expose beyond 30 seconds in Bulb mode if your camera has that limitation. The 6 stop is widely chosen as a first filter, because it allows exposures beyond 5 to 10 seconds even in the afternoon, while at sunset and just after it gets you past 2 minutes without effort. Enough for cloud movement, or for a very flat sea.
8 Stop ND filter (ND256, 2.4)
Reduces light 256 times. It has become one of the favourites for long seascape exposures, and not only those, because it lets you sit between 1.5 and 3 minutes at the moment that matters most: the sun very low on the horizon, just before or just after it touches the water.
That exposure range is loved for what it does to two things in particular. On seawater it is long enough to smooth the surface without flattening it into nothing, and on clouds it stretches the movement into trails while leaving some structure behind. Shorter and you keep too much texture; much longer and you lose it altogether.
10 Stop ND filter (ND1000, 3.0)
With a light reduction of 1000 times this is one of the best-selling filters for experimenting with long and very long exposures, usable from the early afternoon if the daylight is not too harsh or there is cloud cover. As the light falls the effect is accentuated, and immediately after sunset — or even a little before — the shutter speed can become very long indeed, beyond 5 minutes.
Beyond these five, the NiSi range covers virtually every density from 2 to 20 stops, which leaves you a great deal of freedom. The 15 stop, for instance, is made for long exposures in full daylight and in architectural photography — see our guide to daytime long exposure.
Our advice when choosing a first ND filter is to start with a 6 or a 10 stop. Once you have some experience you will know whether your second filter should be a 3, a 4, an 8 or a 15. Most photographers end up with three or four ND filters over time, for the widest possible freedom of expression.
Examples of different ND filter strengths
When choosing a filter and its density, it helps to look at comparative shots. Different exposure times, and therefore different densities, can change the result drastically.
For most professional photographers, and for landscape enthusiasts, ND filters — together with GND (Graduated Neutral Density) and a polariser — are fundamental while shooting. The result is satisfying in itself and gives you the best possible RAW file to develop later.
Below are photographs taken with different ND densities. Drag the slider to compare.
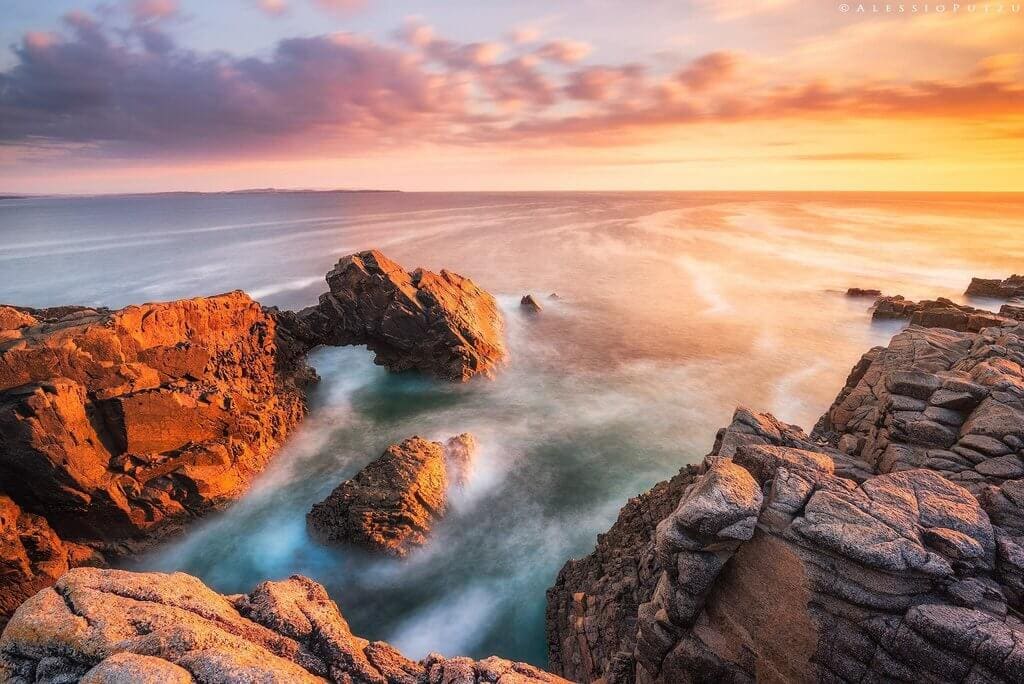
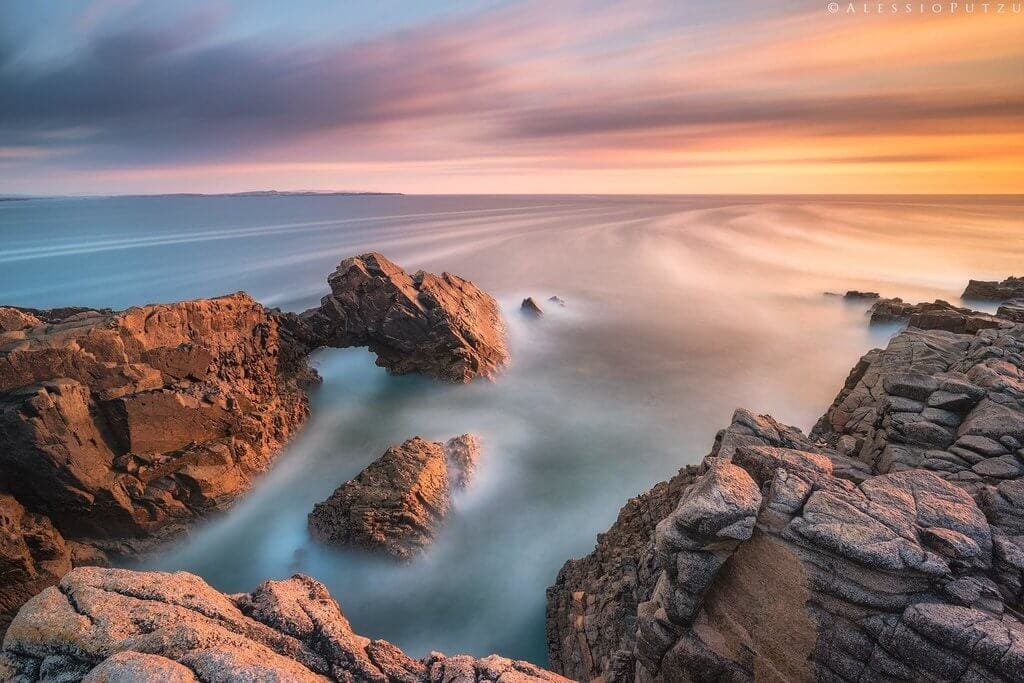
The photograph on the left was taken with a 6 stop ND, plus a 3 stop Hard GND and the polariser. On the right the 6 stop has been replaced by a 10 stop.
The cloud movement is moderate on the left and very prominent on the right. The water is also much smoother and silkier in the right-hand frame. Light moves constantly, especially on days with low cloud, and the slightly shorter exposure on the left caught a moment of more intense light. On the right, with several minutes of exposure, everything balanced out instead — a cloud passed and blocked the light during part of the exposure.
Although we tried to recreate two similar shots in post-production, it is clear that changing the ND filter from 6 to 10 stops alone produced a very different photograph, without touching the GND or the polariser.
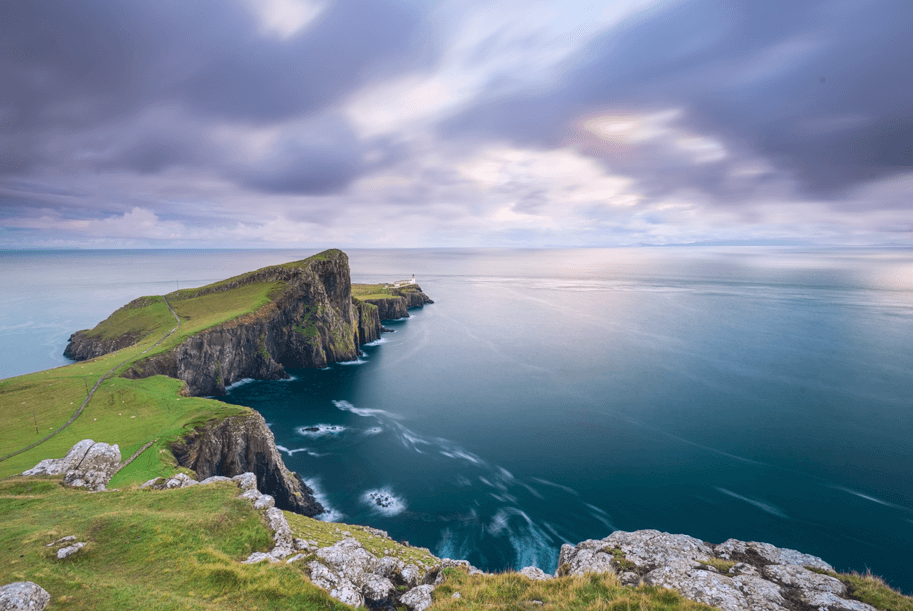

Here the situation is similar to the previous one: ND64 6 stop on the left, ND1000 10 stop on the right.
With the 6 stop the clouds are more defined, the light on the water creates stronger contrast and the foam on the ocean is clearly visible. Extending the exposure to compensate for the 10 stop gives long movement in the clouds, softer light, and a sea filled with gentle trails that lead the eye. Two different photographs, each with its own character, made by two different ND filters.
Products used in these photos
For both of the photographs above the photographer used the products below. The NiSi V7 Holder includes a polariser and other accessories.
-
System 100
 NiSi V7 with True Color NC CPL
 -
GND 100 Series
 100x150mm Hard GND8 (0.9) 3 Stop Filter
 -
ND 100 Series
 100x100mm ND1000 (3.0) 10 Stop Filter
 -
ND 100 Series
100x100mm ND64 (1.8) 6 Stop Filter

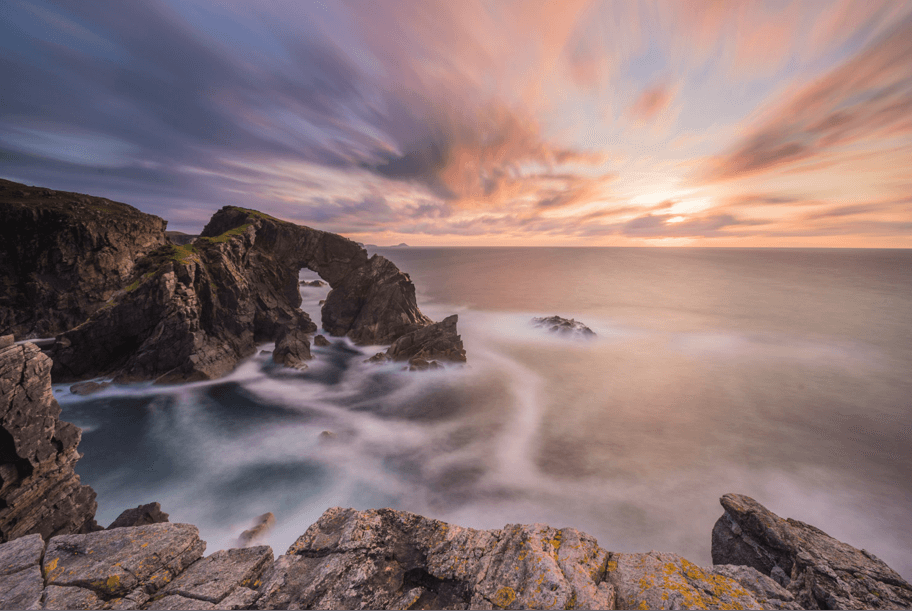
ND16 4 stop on the left, ND256 8 stop on the right. This pair shows exactly what the two sections above describe: the 4 stop holding the moment before blue hour, the 8 stop stretching it into the range where water and cloud change character.
Here we can really see how much the shutter speed changes a photograph. Beyond being taken a few minutes apart, the only real difference is the ND16 or the ND256. The photographer chooses how long to expose and therefore what result to get. With a “long exposure” simulated in software the result would have been completely different, particularly on the waves, and it would not have been possible to reach this quality. The first frame, on the left, was exposed for a few seconds — impossible to obtain that effect by blending photographs in post, where you would get pronounced ghosting and plenty of artefacts. Filters give you the freedom, and the pleasure, of shooting.
Products used in this photo
-
System 100
NiSi V7 with True Color NC CPL -
GND 100 Series
 100x150mm Medium GND8 (0.9) 3 Stop Filter
 -
ND 100 Series
100x100mm ND256 (2.4) 8 Stop Filter -
ND 100 Series
100x100mm ND16 (1.2) 4 Stop Filter

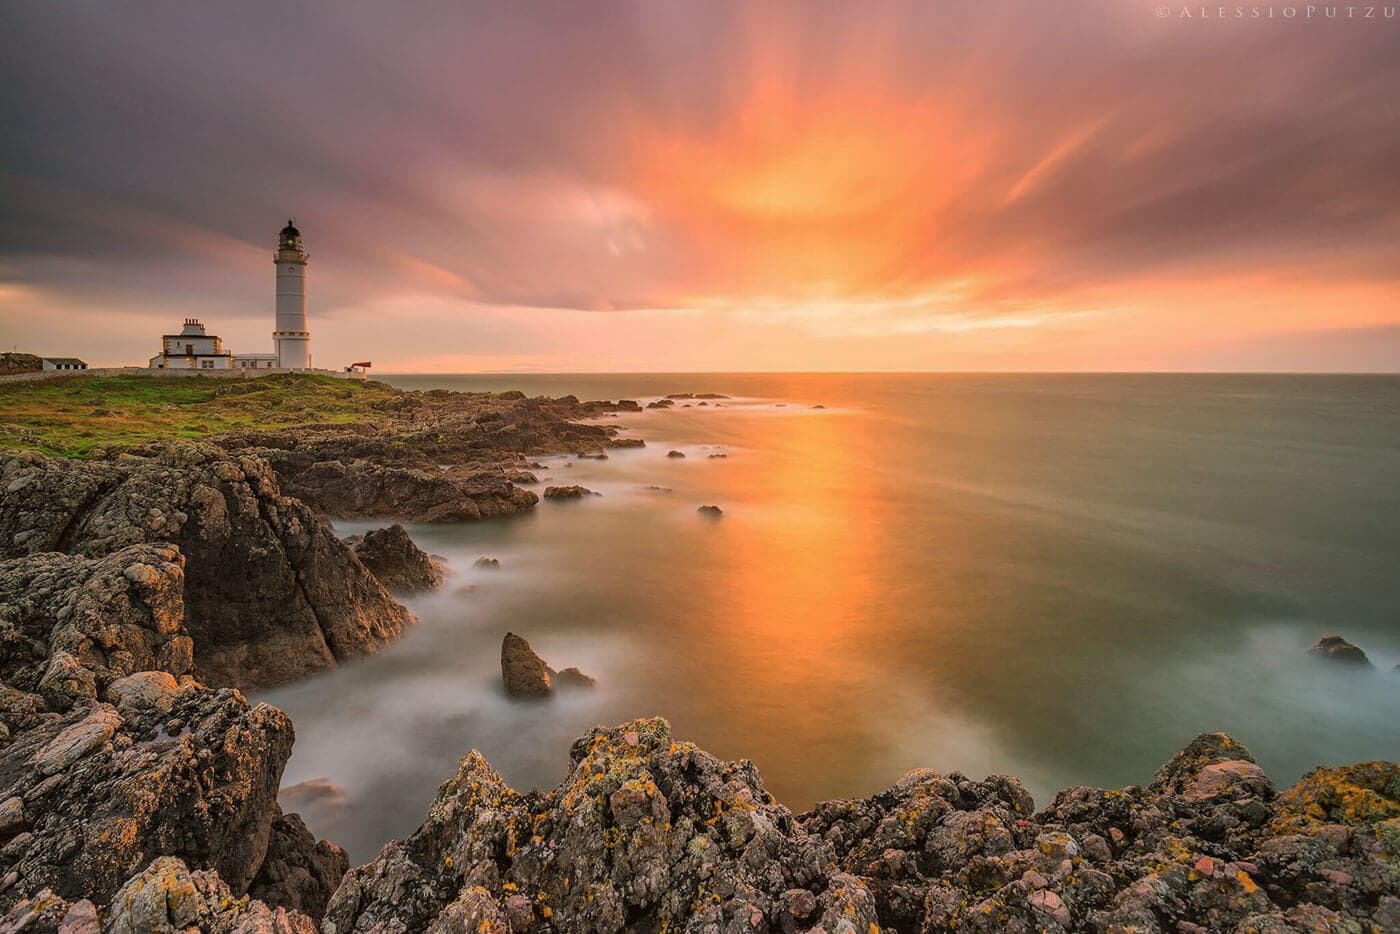
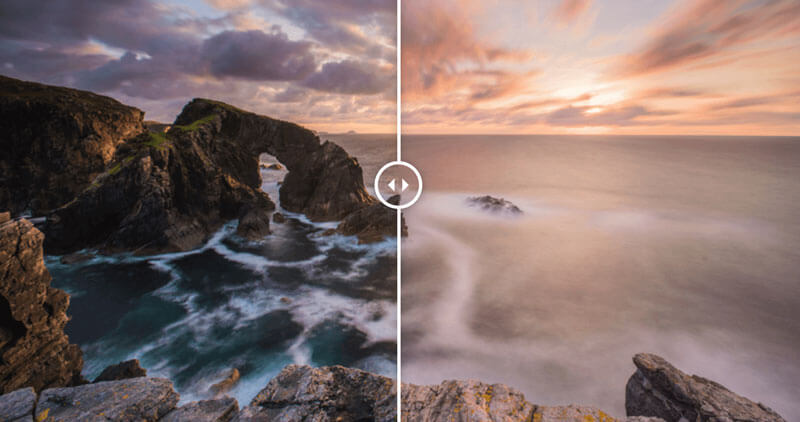
ND8 3 stop on the left, ND1000 10 stop on the right.
On the left the waves are moving but still hold their shape: the force of the water and the dynamism of the scene come through. The backlight, softened by cloud, was balanced with a 3 stop Hard GND, which captured the wide dynamic range (more on dynamic range here). On the right, the 10 stop produced gradual pastel colours — the filter changed the photograph completely.
Products used in this photo
-
System 100
NiSi V7 with True Color NC CPL -
GND 100 Series
100x150mm Hard GND8 (0.9) 3 Stop Filter -
ND 100 Series
100x100mm ND1000 (3.0) 10 Stop Filter -
ND 100 Series
100x100mm ND8 (0.9) 3 Stop Filter
What ND filter to choose for landscape photography?
What follows is the short answer, aimed at putting a kit together. If you want to see the reasoning applied frame by frame — which density produced which effect, and at what shutter speed — that is the subject of our article on ND filters for landscape photography.
Looking at the frames above, it is tempting to conclude that you need every density there is. That is the obvious answer, so here is a less expensive one.
If you are starting with long exposure, beginning with a single filter is a good idea. If you often shoot at sunrise or sunset, with the sun low or already below the horizon, we recommend starting with a 6 stop or the classic 10 stop.
Once you are more experienced, two or three ND filters are the natural middle ground. If you want to work closer to 1 or 2 seconds, for effects like the left-hand frames above, adding a 3 stop is ideal. If you already own a 6 stop and want to go longer rather than shorter, it is time for the 10 stop. The classic ND kit is 3-6-10.
Two densities deserve a second look before you settle on that classic set. The 4 stop can take the place of the 3 stop if you prefer slightly longer exposures, and the 8 stop has become a favourite for seascapes with the sun low on the horizon. Add the 15 stop for daylight work and you have the extended kit that many photographers end up with: 3-6-8-10-15.
Note: all the photographs in this article are by Alessio Putzu, who kindly gave us permission to use them. All were taken with NiSi ND filters, NiSi GND filters and the Landscape Polariser, sold separately for the V7 Holder with True Color CPL. The photographs are intended to demonstrate the difference between one density and another. All were post-produced by the photographer at different times and in his personal style, so they should not be read as laboratory tests of colour cast or chromatic aberration — defects NiSi filters are known for being free of.
Save up to over 30% with ND filter kits
NiSi offers ND filter kits that save from 10% up to 30% on the purchase of 2, 3 or 4 filters. Every kit includes the soft case for four filters, four replacement gaskets, a cleaning cloth and a guide to using the filters.
-
Kit 100 Series
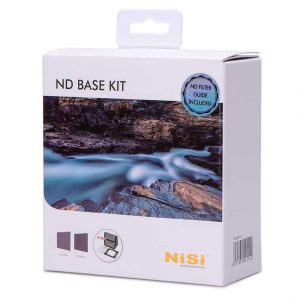
100x100mm Base ND Filter Kit
Add to basket -
Kit 100 Series
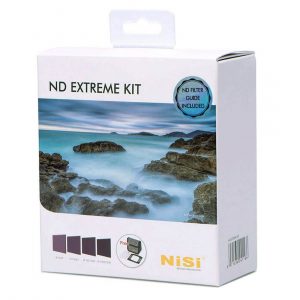
100x100mm Extreme ND Filter Kit
Add to basket -
Kit 100 Series

100x100mm Long Exposure ND Filter Kit
Add to basket
Prefer magnetic filters to a square holder?
Everything above is about density, and density works the same way whatever the filter is mounted in. If you shoot video, or simply prefer circular filters that snap on and off rather than a holder and square plates, the same range of strengths exists in the magnetic JetMag Pro system — including a variable ND that covers 1 to 5 stops in a single filter.
Common questions about ND filters
What does ND stand for?
Neutral Density. Neutral because the filter is designed to absorb every colour of light by the same amount, and density because what it does is make the glass denser to light — darker. The form you will actually see printed on the filter is the ND number, such as ND8 or ND1000.
How many stops do I need?
For a first filter, 6 stops (ND64) or 10 stops (ND1000). The 6 stop is the more usable of the two through the afternoon; the 10 stop takes you into exposures of several minutes around sunset. The table at the top of this page maps every density to the situation it suits.
Do ND filters change the colour of the photograph?
A good one should not. A poor one usually does: a blue or magenta cast that grows stronger as the density goes up, and is at its worst from 10 stops upwards. It can be partly corrected in raw, but rarely completely, because the shift is often not uniform across the frame.
Can I stack two ND filters together?
Yes, and the stops add up: a 3 stop on top of a 6 stop gives you 9. It is a legitimate way to reach a density you do not own. The cost is two more glass surfaces in the light path, so keep them clean — and on a wide lens, two stacked circular filters can start to vignette in the corners.
Do I need a tripod and a remote release?
A tripod, always: any exposure long enough to need an ND filter is far too long to hand-hold. A remote release starts to matter past 30 seconds, which is where most cameras stop and Bulb mode begins — and a 6 stop filter will take you there on an ordinary afternoon.
What is the difference between an ND and a variable ND?
A fixed ND has one density. A variable ND covers a range — 1 to 5 stops, for instance — by rotating the front element, so you change the strength without changing filters. Fixed NDs are the norm in landscape photography, where you have time and want the cleanest possible glass. Variable NDs are the norm in video, where the light moves while you are still shooting. If you are weighing one up, we compare the magnetic and the screw-in variable ND here.


